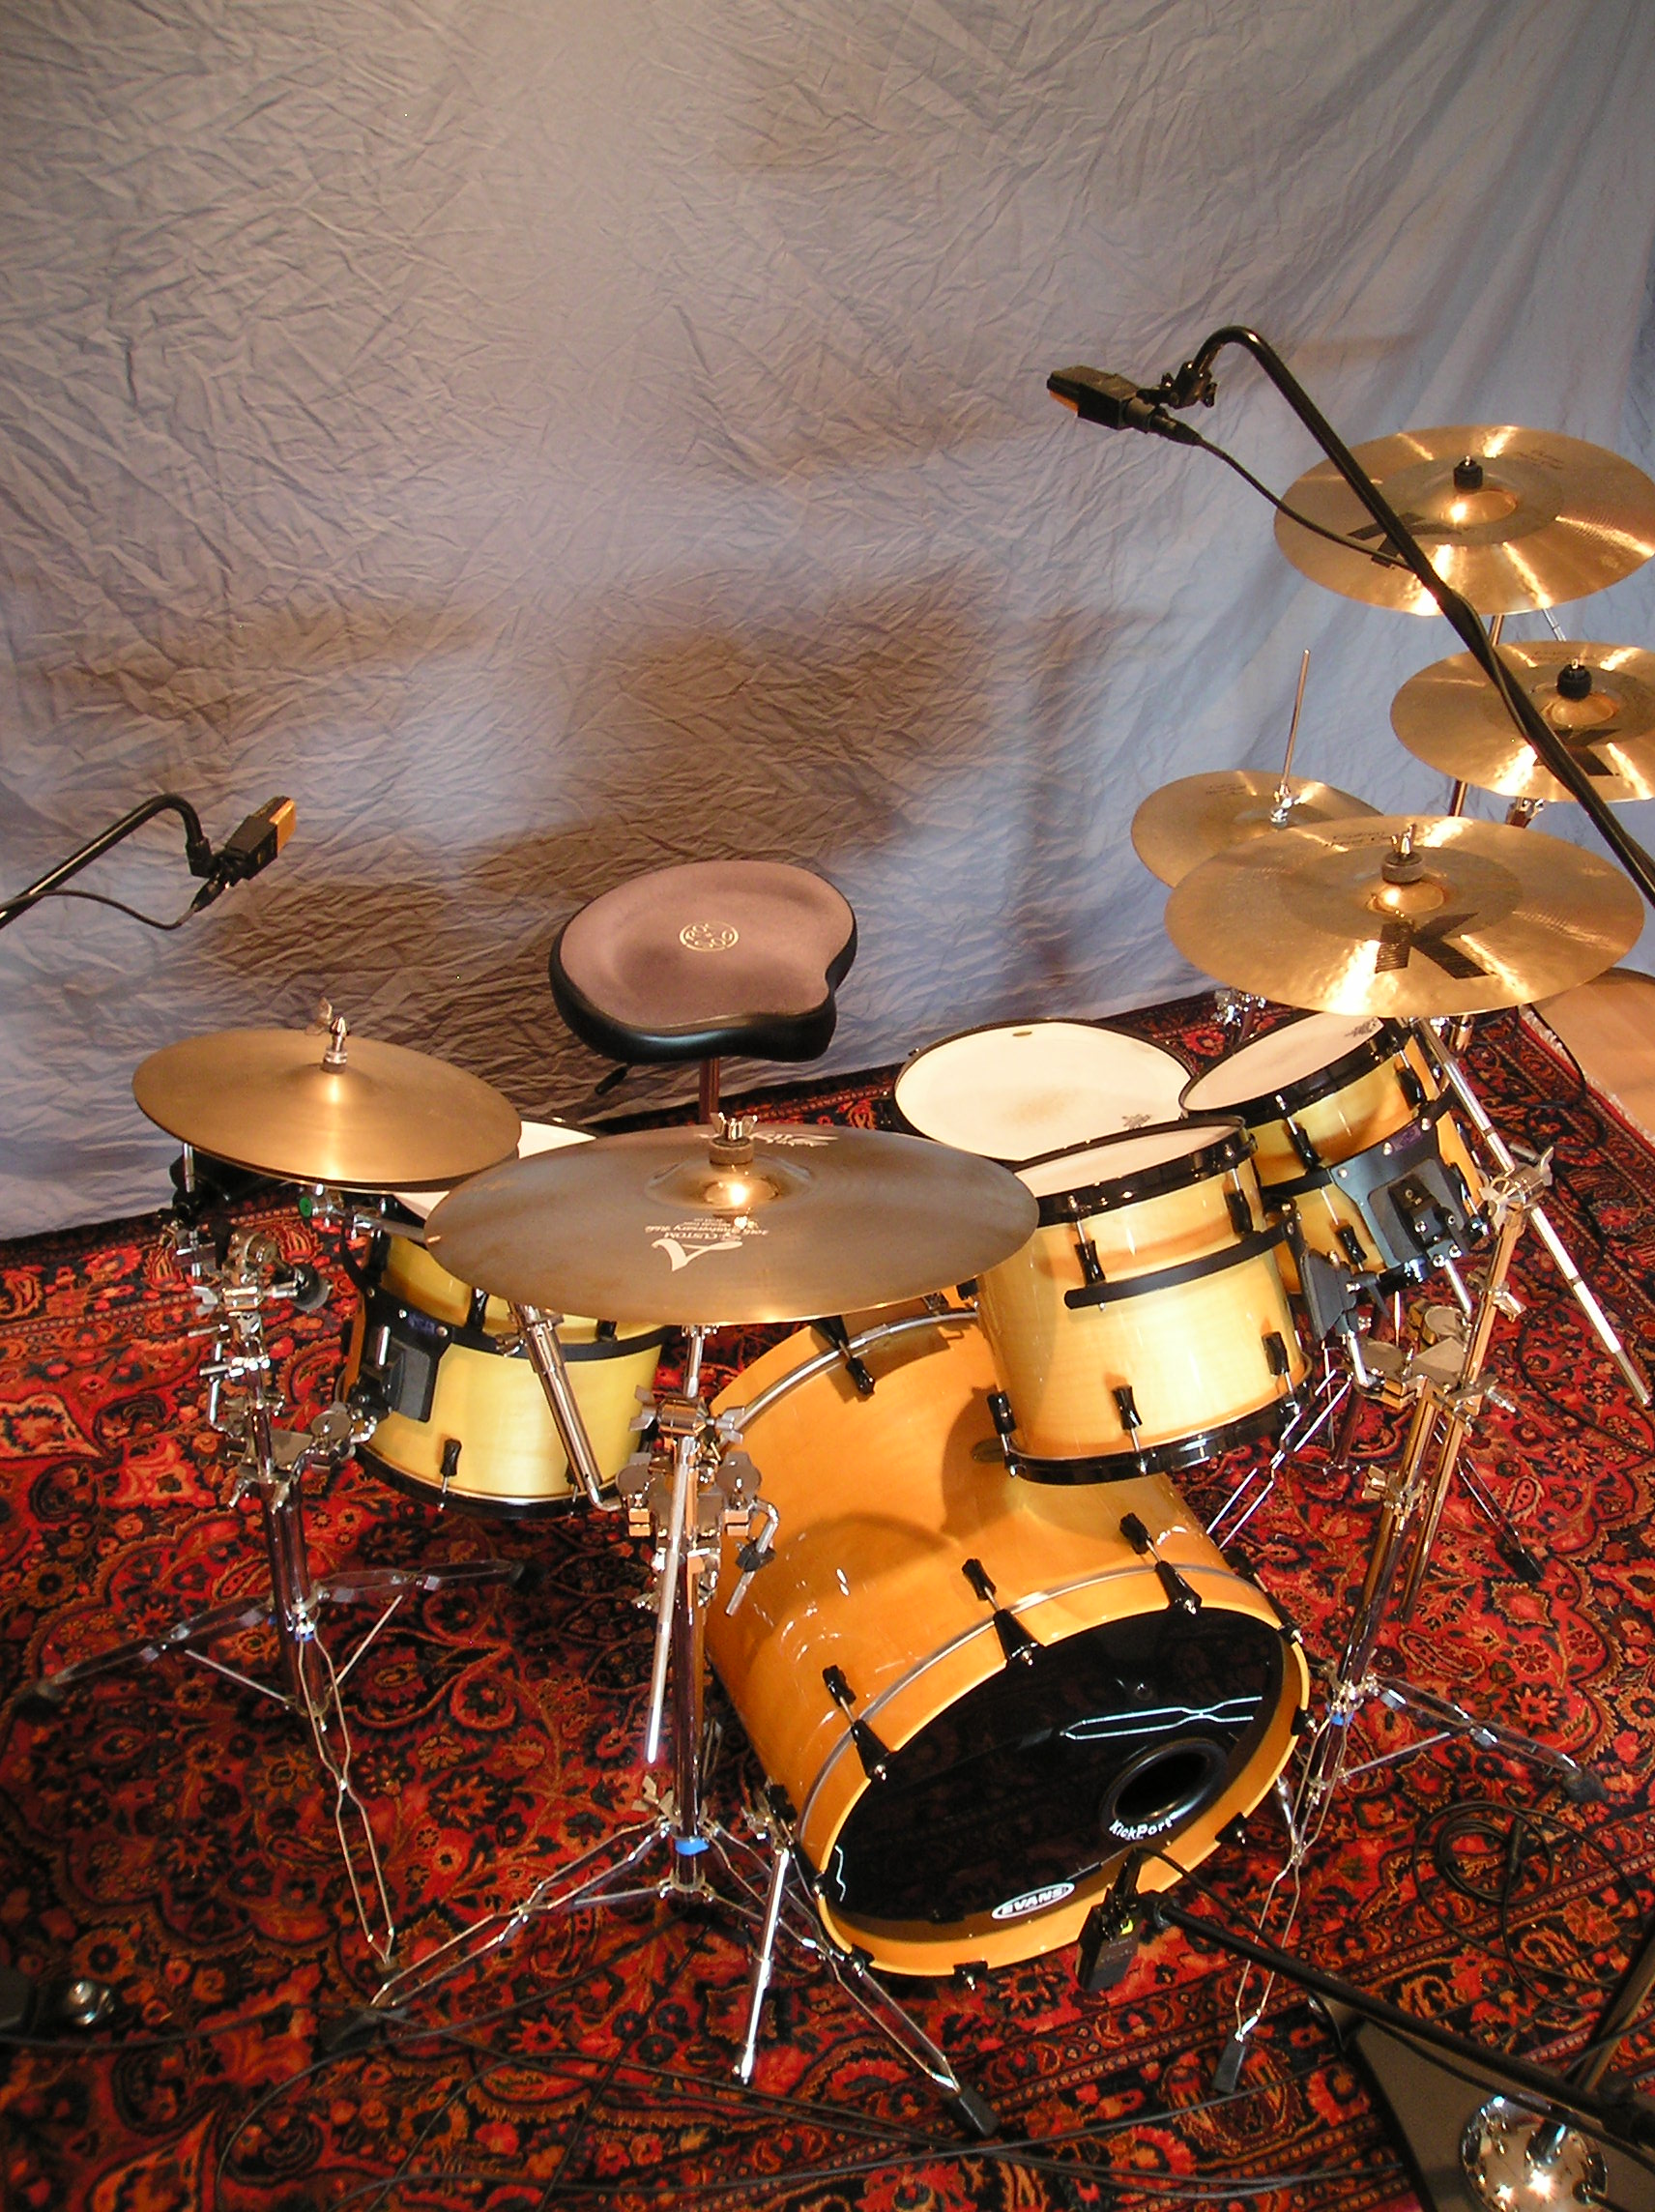
Electronic Insights: Minimal Miking Techniques
May 2013
Electronic Insights
Minimal Miking Techniques
One-, Two-, and Three-Mic Setups for a More Natural Sound
by Mark Parsons
Whether you use the term “minimal,” “organic,” “old school,” or “vintage,” there’s definitely a renewed interest in capturing that drumset-in-a-room vibe that was employed on pretty much any recording prior to the late 1960s, when close miking became the norm. Early Motown music, bebop, classic rock, and more recent productions by the Black Keys and the White Stripes all feature a sonic landscape containing the raw power of the drumset considered as a single instrument existing in a real space. In this article we’re going to take a look at a few different ways to capture that sound with a simple setup involving one, two, or three microphones.
The Basics
There are no hard-and-fast rules when it comes to recording, other than if it sounds right for the song, it is right. So take the following information as a good starting point and adapt from there. The key is to experiment.
Microphones. Cool drum sounds have been captured with practically every mic ever made, so there’s no need to stress if you don’t have a locker full of vintage German models. Large condensers, small condensers, dynamics, and ribbons are all capable of capturing musical, organic drum tones. Of course, it would take a book to describe every available microphone, so we limited ourselves to using three similar large-diaphragm condensers during our demos (samples are posted at moderndrummer.com), due to their ability to capture a full range of tones in a fairly linear fashion. Advertisement
Pattern. If your mics have a choice of polar patterns, you’ll want to experiment. Switching from a directional cardioid to a 360-degree omni pattern, for example, will obviously allow a lot more of the room—as well as other instruments, if applicable—to enter into the equation. Likewise, using a ribbon mic will not only add the rounded top and warm bottom that these models are known for, but will also capture ambience from the rear, due to its figure-eight pattern.
Room. The space your drums are in will make a bigger difference in a minimal-miking session than in a typical close-miking situation. Bigger is usually better, especially concerning ceiling height. Higher ceilings give the drums some room to breathe before the sound reflects back down. (Ceiling reflections can create a boxy sound.)
Reflective floors and absorbent ceilings are usually better than the other way around (carpet below and drywall above, for instance). You also want the drums to be at different distances from major reflective surfaces. For instance, the back wall could be 3′ behind your throne and the ceiling 7′ above your cymbals, with one side wall 9′ to your left, another side wall 12′ to your right, and the far wall 20′ in front of you. That will usually work better than being in the middle of a cube when it comes to getting smooth, natural-sounding reverberation. Advertisement
Drums. Think of the kit as one instrument. During a typical close-miked session, it doesn’t matter so much if your snare is five times louder than your floor tom. You tune and prep each drum for its optimum tone (instead of for volume), and then you simply bring up the quieter parts in the mix until a proper balance is achieved. When you use minimal miking, you must be sure to achieve a proper balance as you play, because there isn’t much you can do during the mix to significantly alter any one piece (with the exception of the bass drum in some instances). Tune your kit so that everything sounds in balance when you play in the room.
Playing. How you strike the drums is more important than which drums you use. Listen to your kit while you play, either in the room or on playback. Are you bashing your cymbals to the point where the toms are too low by comparison? Are your dark-sounding vintage hi-hats getting lost next to the slamming rimshots on your wide-open metal snare? You can move the mics around to compensate slightly for some balance issues. But in reality, if it isn’t balanced when you play it, it likely won’t be balanced in the final product.
One Microphone
When you use a single mic to record the entire kit (either by necessity or artistic choice), mic placement will be determined by the amount of “air” you want to hear around the kit and what else is going on during the tracking session. The farther from the kit you place the mic, the more ambience (room sound) you’ll get. But if other instruments are also playing, the more bleed you’ll get too. Advertisement
Another decision is whether to favor the bass drum or some other part of the kit. Snares, toms, and cymbals tend to radiate upward, while the kick radiates outward. Therefore, the best kick sound is typically captured in front of the bass drum, while the best overall sound is usually gotten from above the kit. But you can still achieve both with some compromise.
For capturing the entire kit with a single mic, we chose a fairly neutral, full-range condenser because it can pick up the extremely wide frequency range of the drumset. (If all you have is a basic dynamic vocal mic, go with it and make it work. Many records have been made with cheaper mics.)
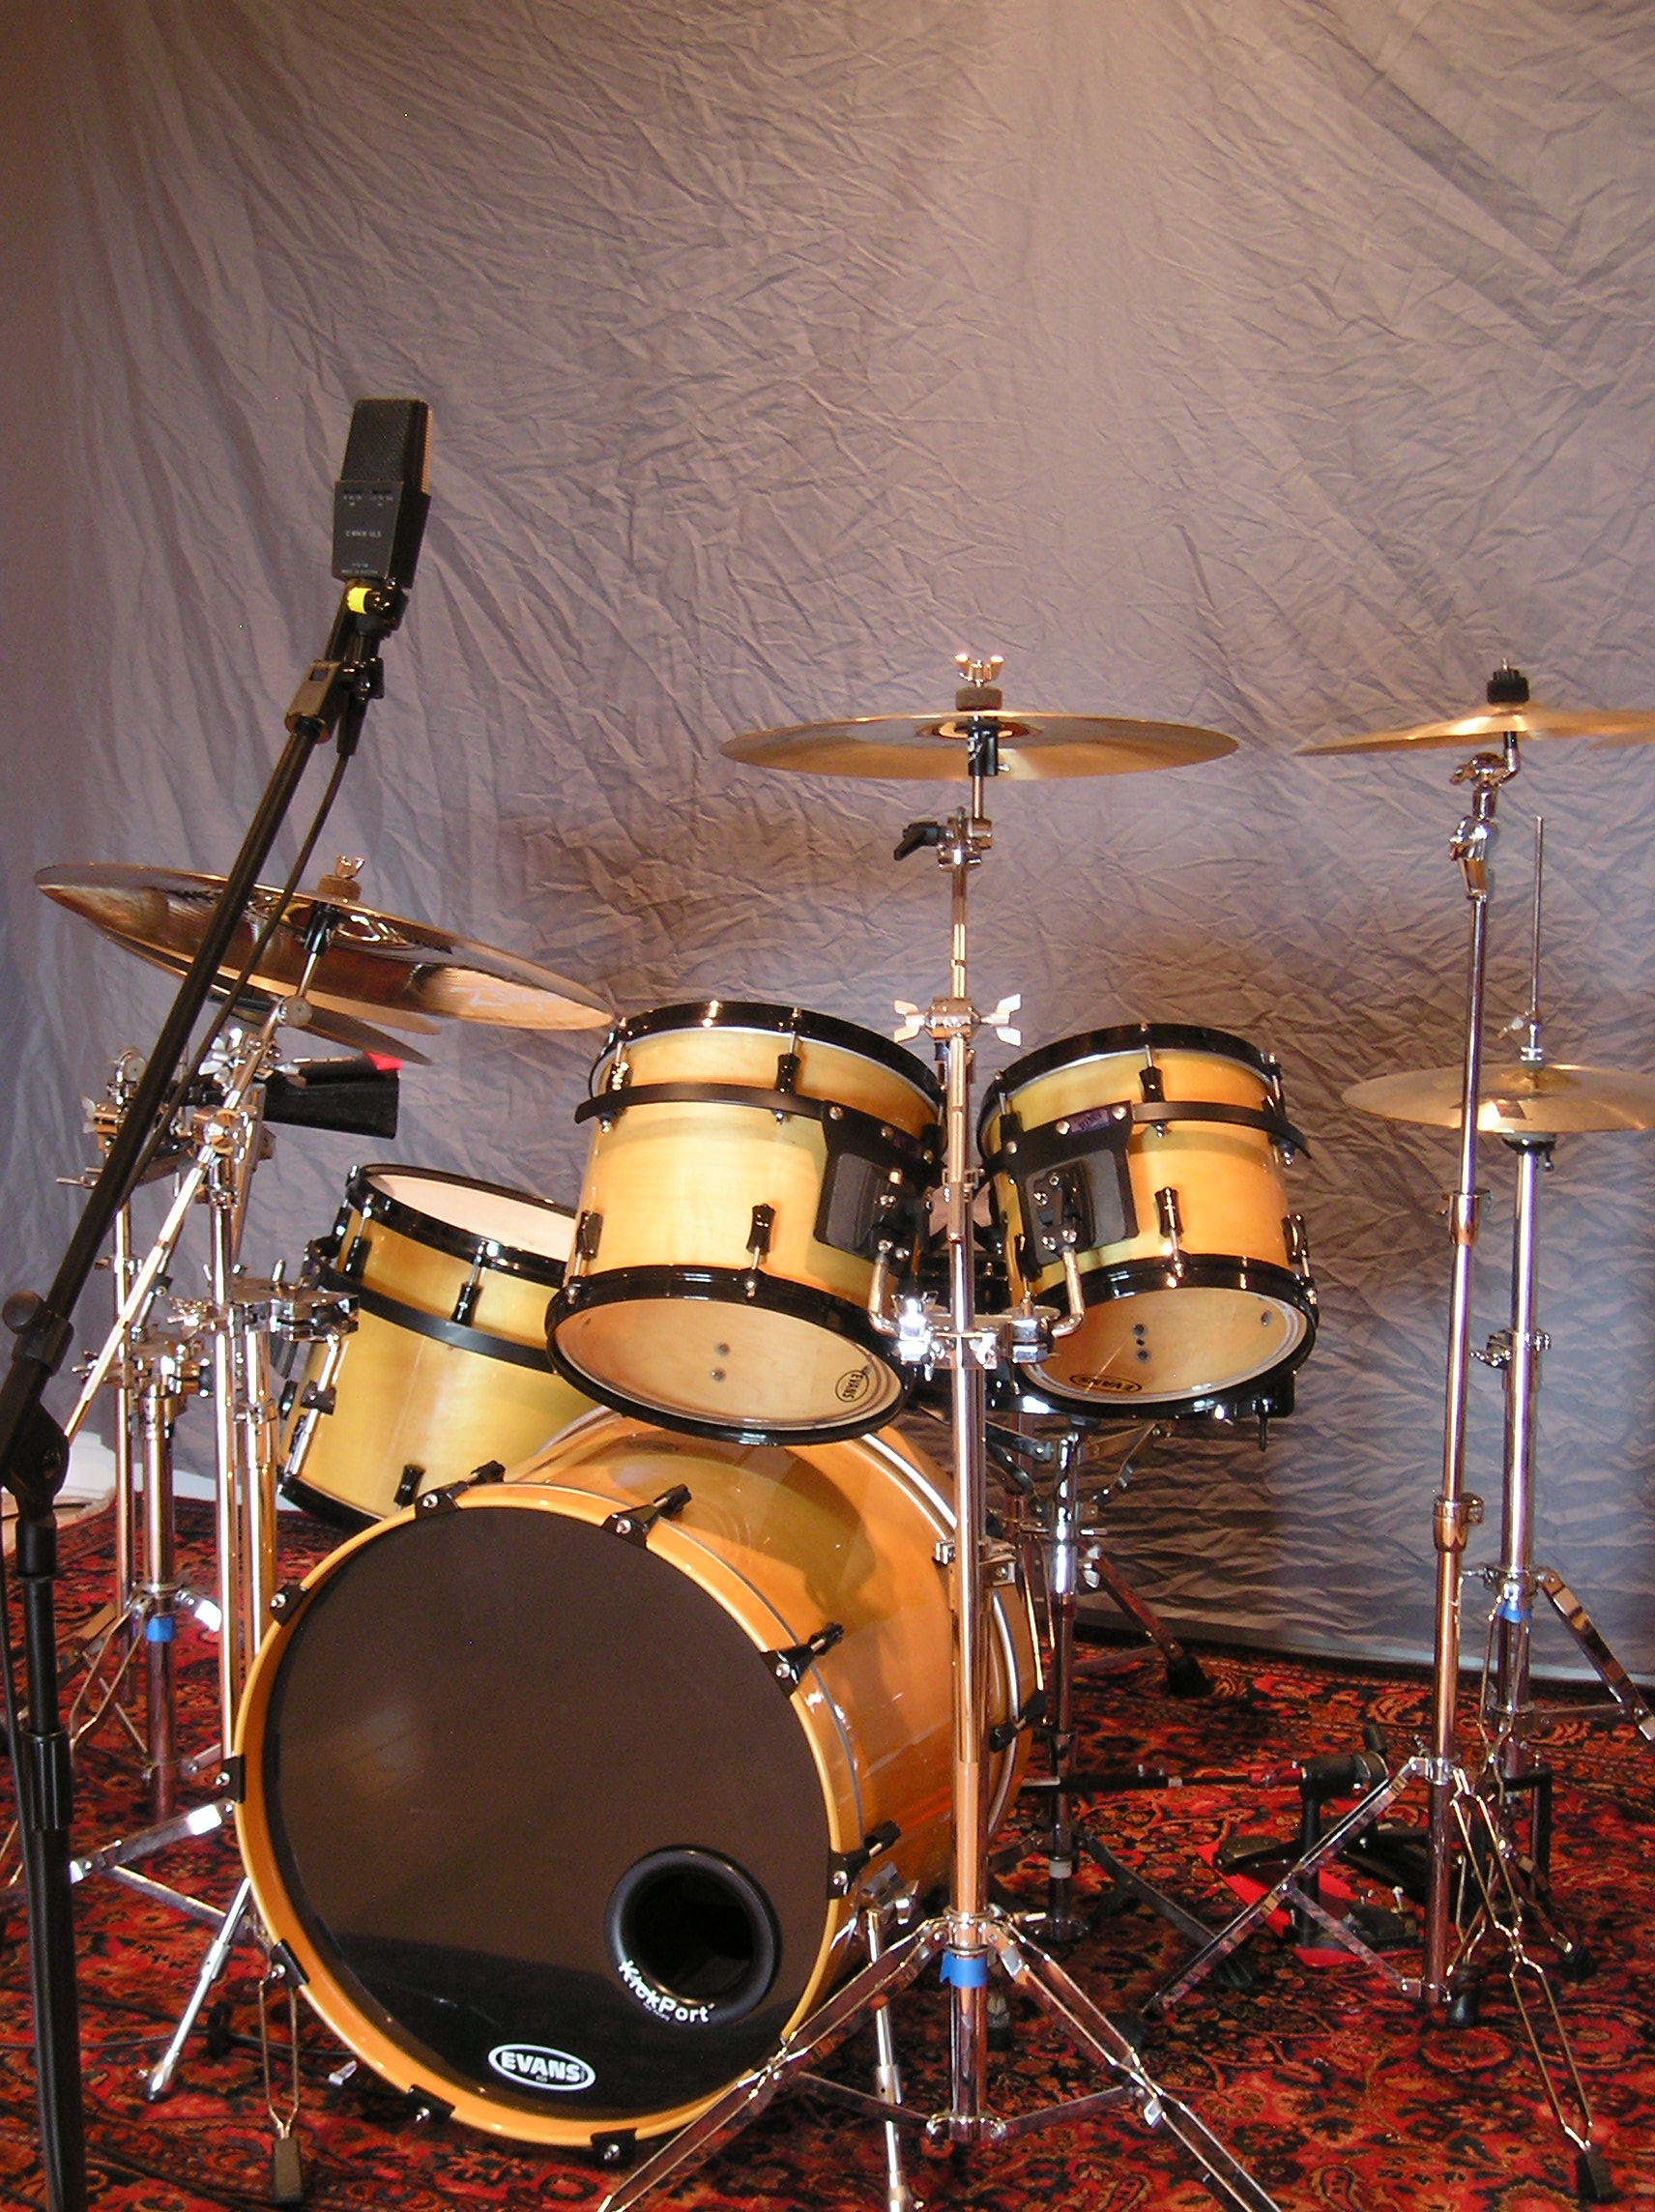
You can usually get a good overall one-mic balance if you go for a symmetrical placement where the microphone is the same distance in front of the bass drum as it is off the ground. We ended up with the mic 5′ high and 5′ in front of the resonant head of the kick, angled down a little (30 degrees) and pointed toward the snare. Advertisement
A little compression can smooth things out in terms of levels, and it’ll bring up the room ambience a bit while adding some “smack” to the attack. Carving out the lower mids with EQ will help you keep your kit from sounding boxy.
Two Mics
If you have two microphones, try using one for the bass drum and one as an overhead. This won’t give you a stereo image of the kit, but it will provide a cleaner overall sound. It’ll also open up your processing options, as you can treat the two mics with different EQ and compression. And in the mix you’ll have some control over the level of the kick relative to the rest of the kit, which can be a big benefit.
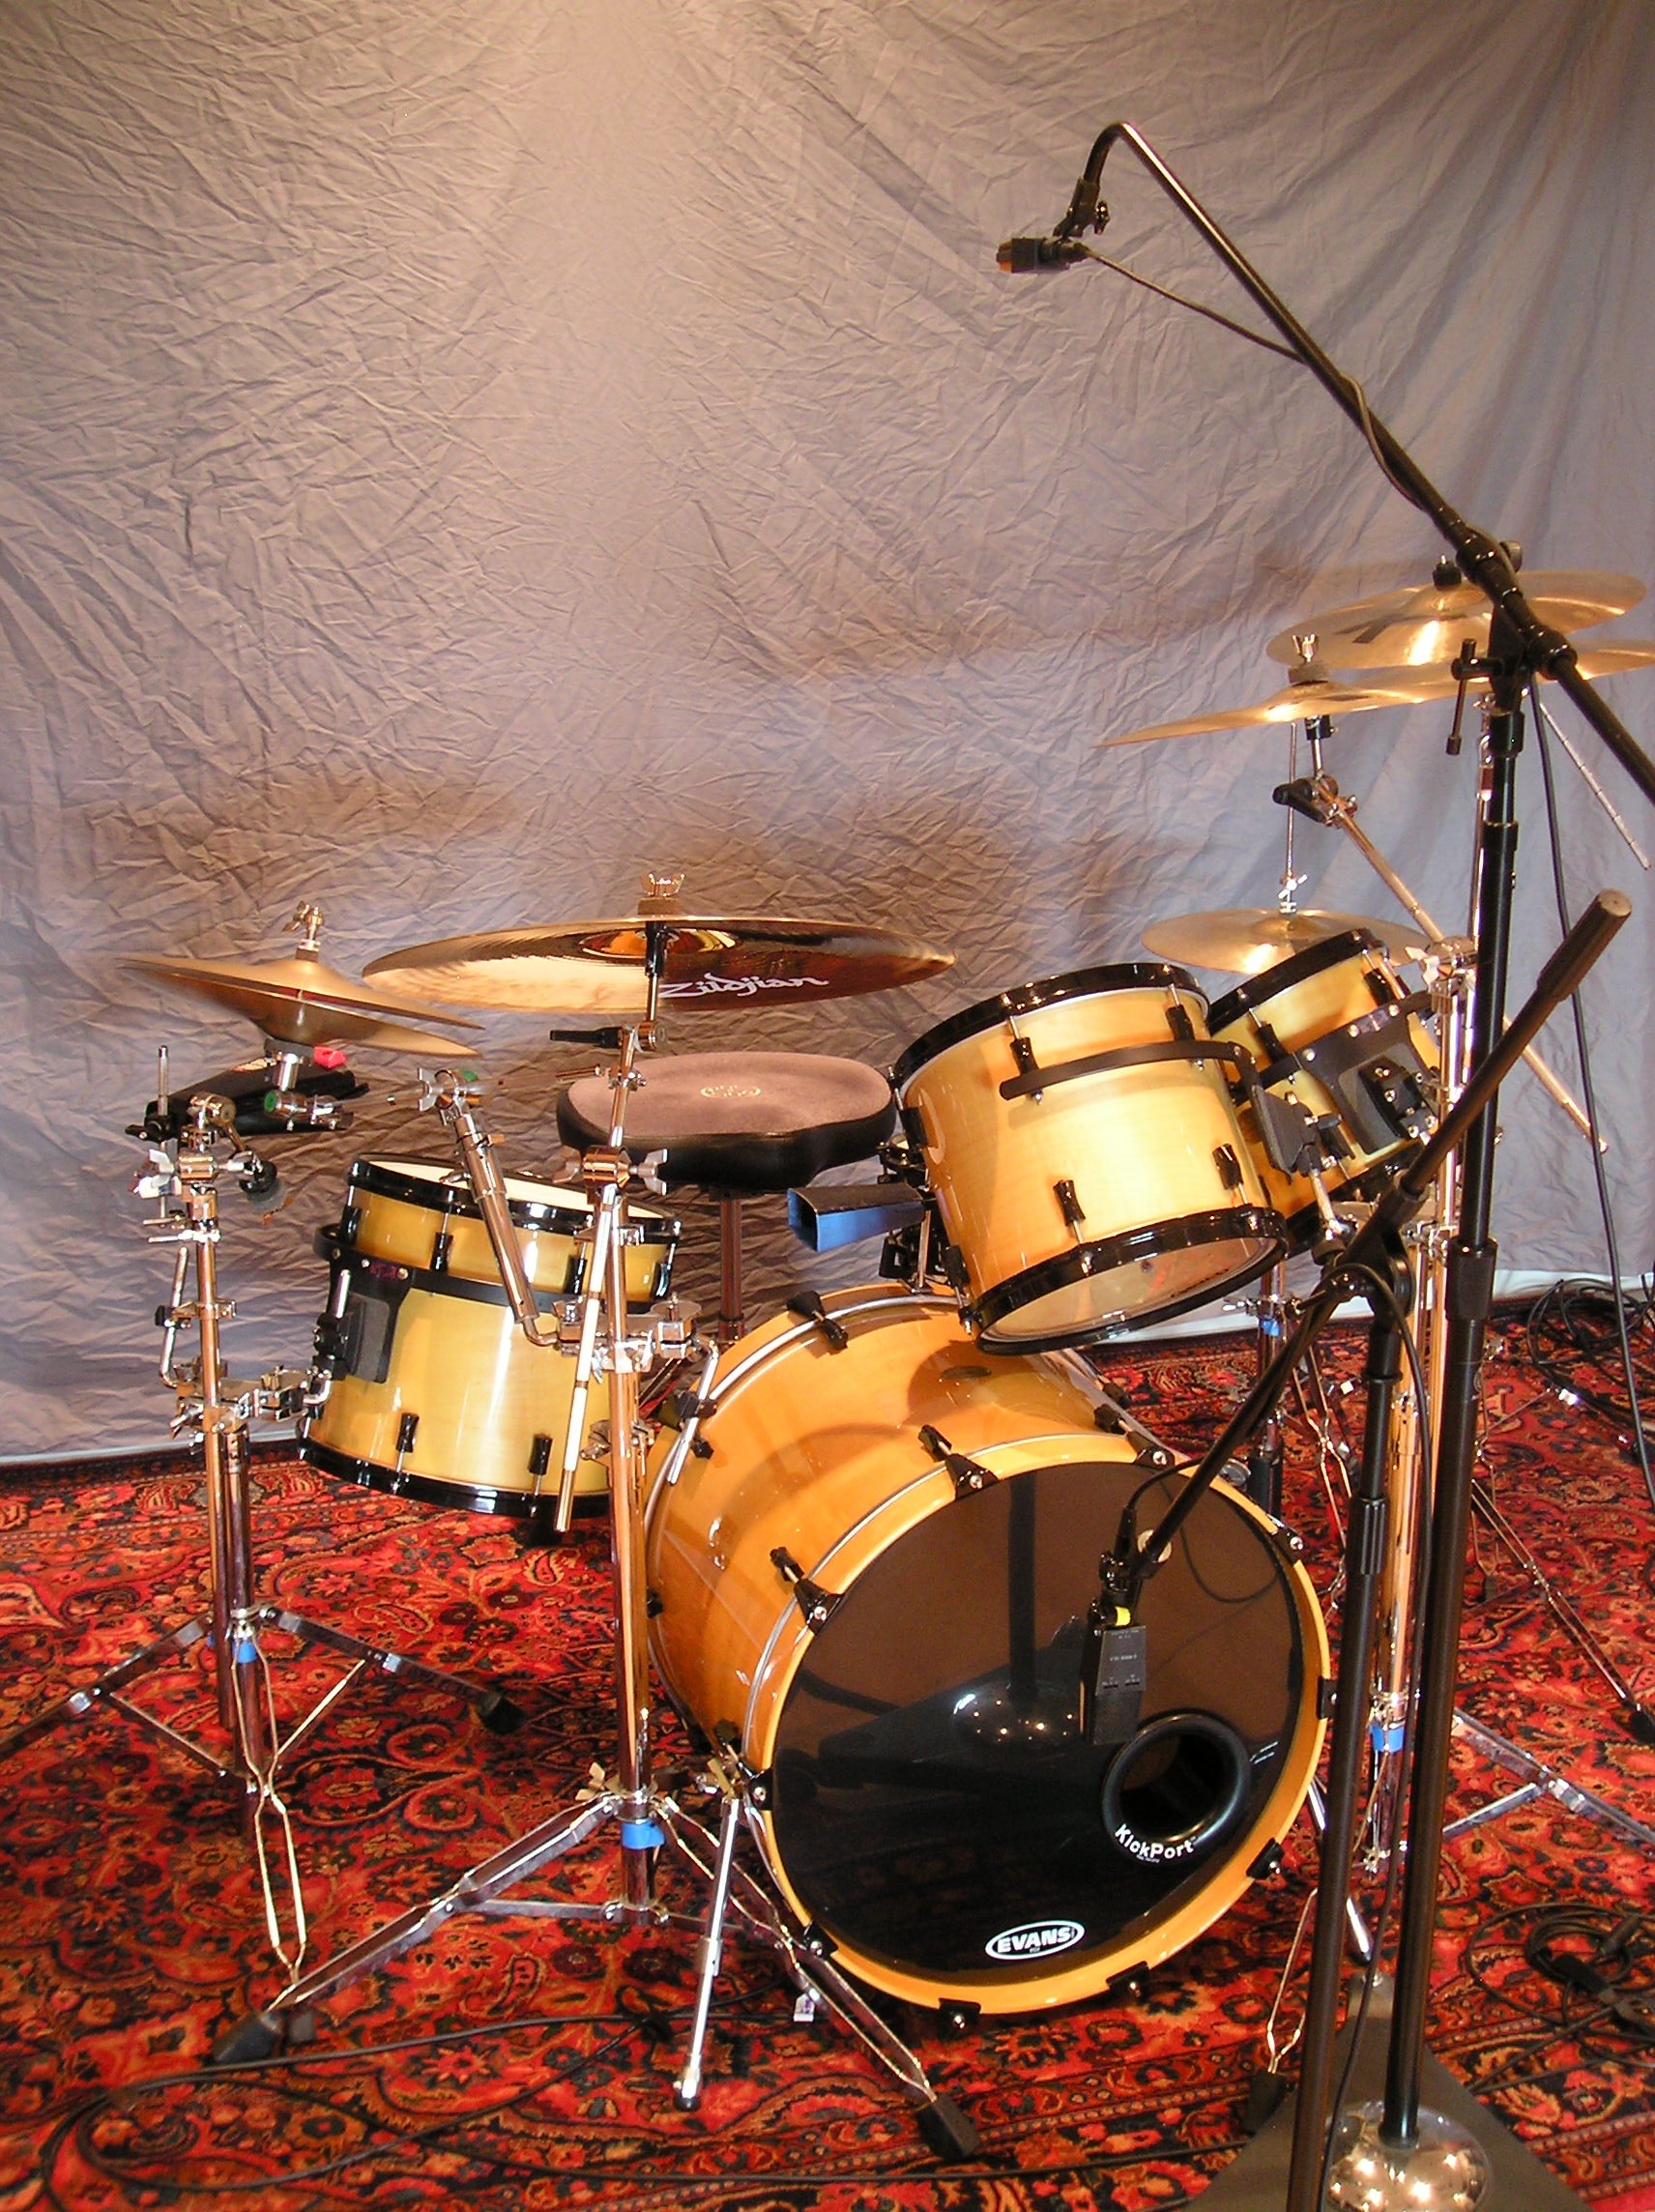
We used the same mic on the kick that we originally had in front of the kit, only we moved it to about 12″ from the front head and 16″ off the ground. We then placed a similar second mic over the center of the kit, 36″ above the snare. (Experiment here, as varying this distance will raise or lower the ambience of the final drum sound.) The resulting sound was a little tighter than the one-mic track, due to the closer proximity of the mics to the kit. Advertisement
Three Mics: Coincident Pair of Overheads and Bass Drum
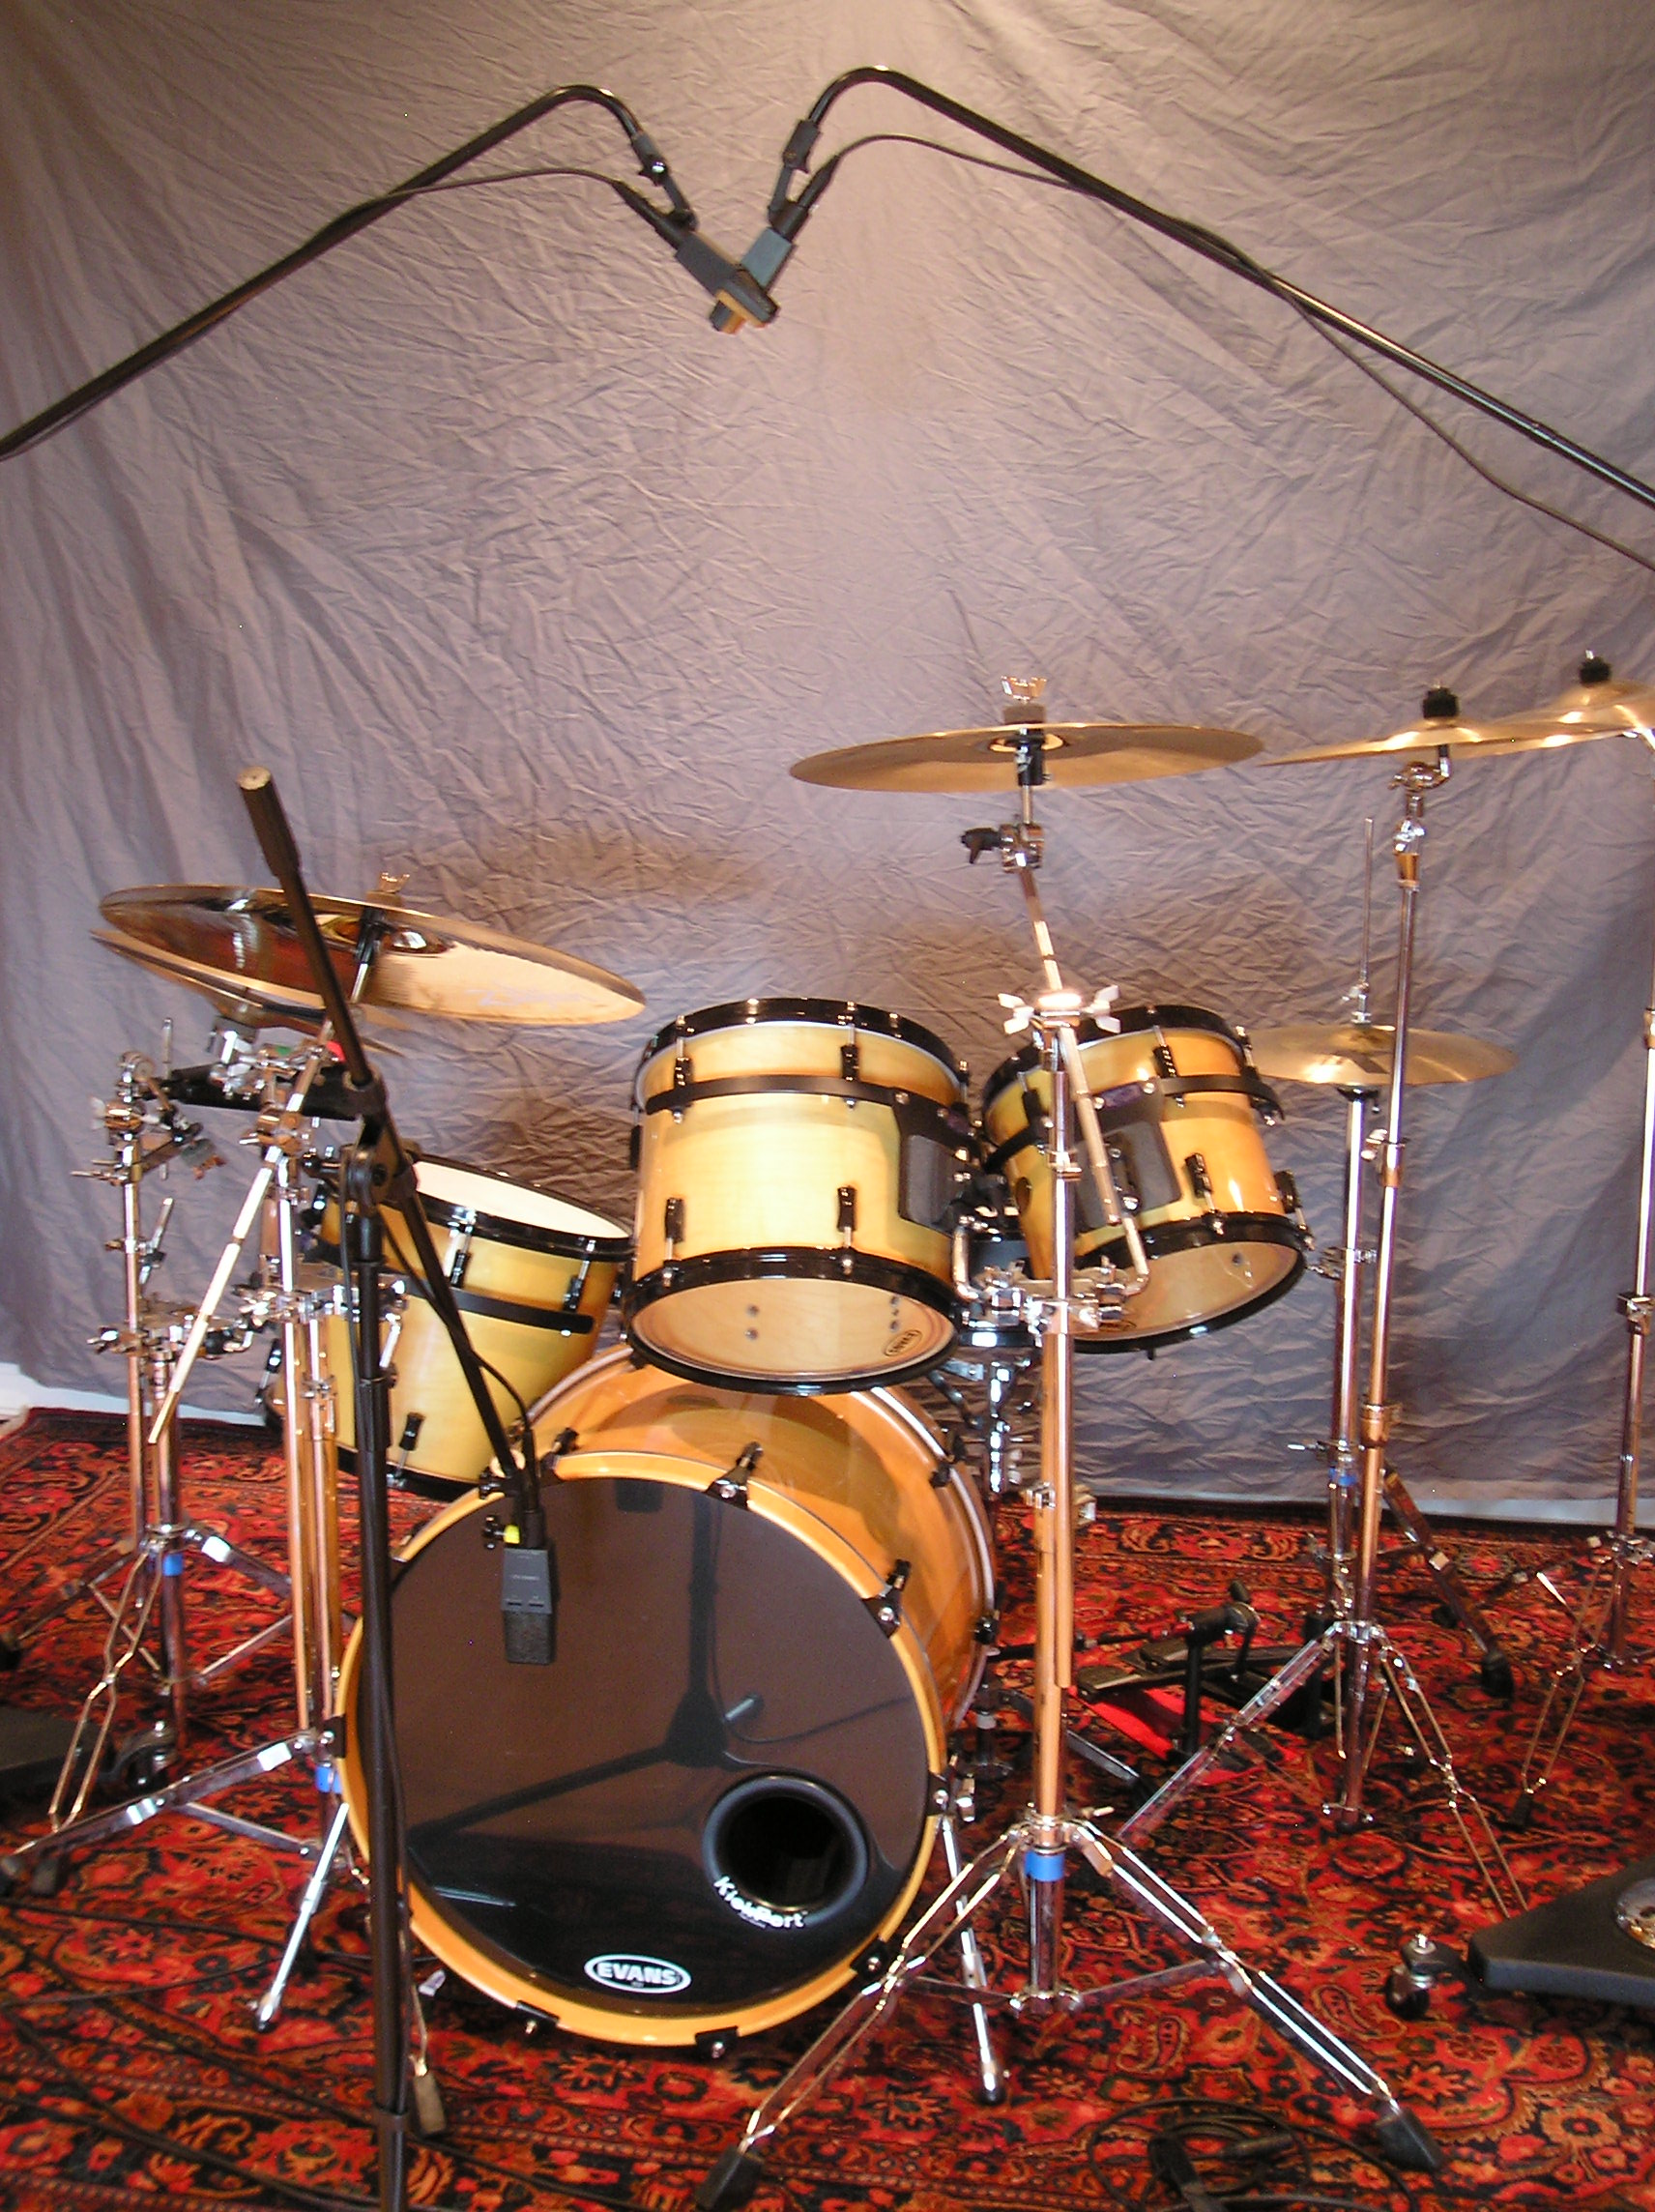
A coincident pair (X/Y) configuration has the capsules of two overhead mics placed as close together as possible and at a 90-degree angle. This provides a stereo image, but since the mics are right next to one another, there’s no arrival-time difference, which mitigates phase problems. The downside is that a coincident pair has limited stereo spread.
The two capsules are typically set pointed toward the left and right sides of the kit. We ran a pair at the same height as the mono overhead (36″ above the snare) and panned them hard left and right. We left the kick mic as it was in the two-mic setup.
The X/Y arrangement results in a realistic, but not dramatic, stereo image, similar to listening to a drumset from several feet in front. This technique works especially well for jazz and acoustic music where you want a realistic but not hyped representation of the drumset. Advertisement
Three Mics: Spaced Pair of Overheads and Bass Drum
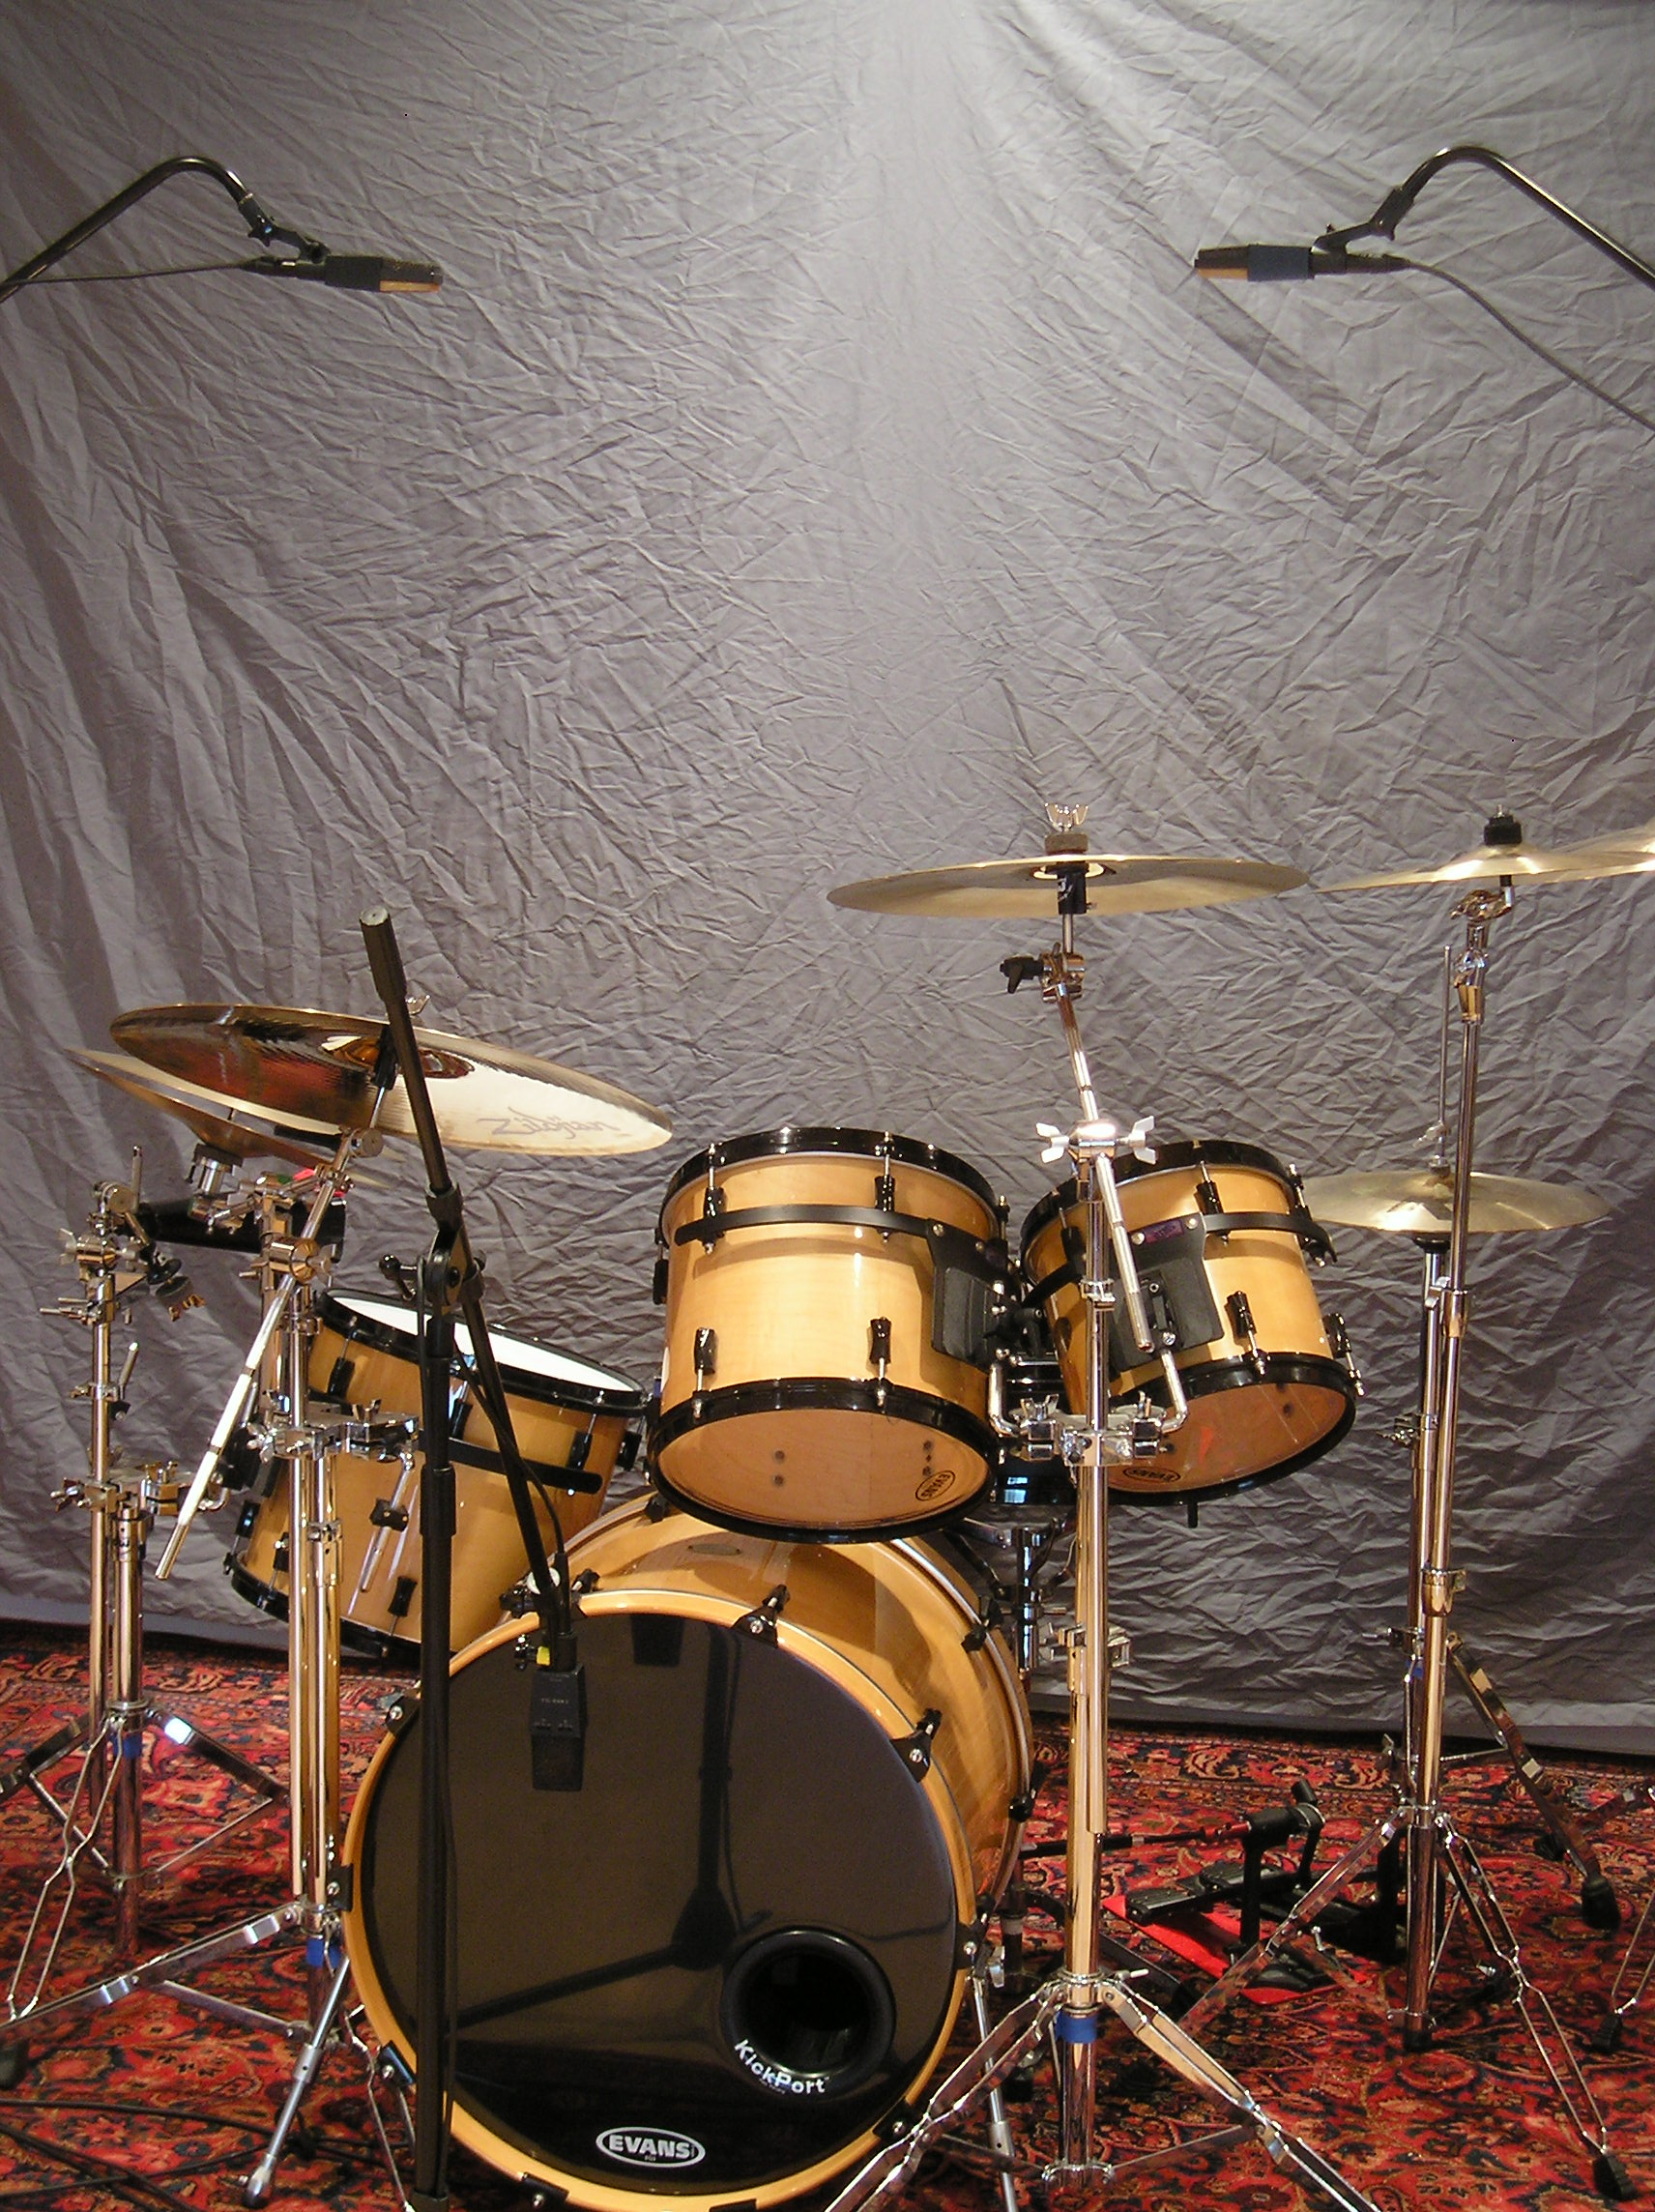
Also known as the A/B configuration, the spaced pair is a common arrangement of overhead drum mics. The microphones are spread evenly above the drumset at equal heights, pointing straight down. Spacing between the mics is typically in the range of 24″ to 48″ (we went with around 36″), and the height can vary. We ended up going slightly higher than before, approximately 42″ above the snare.
The spaced-pair arrangement has been used on most studio drum tracks from the past thirty to forty years. The big difference with our setup is that the overheads are responsible for capturing the entire kit (minus the bass drum), as opposed to augmenting close mics. This position gives you a broader, more definite stereo spread than X/Y, resulting in a wider left-to-right image, due to subtle arrival-time differences between capsules—on the order of a few milliseconds. This difference is what helps your ears locate specific instruments within the sound field.
Three Mics: Isosceles Pair and Bass Drum
This setup is a little different but definitely worth a try, especially if you’re looking to catch an old-school, hard-hitting rock ’n’ roll sound. Popularized by noted engineer/producer Glyn Johns (Rolling Stones, the Who, Led Zeppelin), this arrangement is called isosceles because the two overheads form an isosceles triangle with the snare. (Note: Johns frequently ran a snare mic as well.) Advertisement
The secret to the configuration is in the location of the two isosceles mics. One mic is located directly above the snare. (A time-honored tradition is to use the spacing of two standard-size drumsticks—32″.) The second microphone is located a little above, beyond, and behind the floor tom. Using a tape measure, place this mic the same distance from the center of the snare as the overhead mic. The mic should point across the top of the floor tom toward the snare and smaller toms, which ensures that the snare sound will reach both mics at the exact same time, resulting in a strong, well-defined, and in-phase snare tone. This configuration allows the mics to capture the toms better than in other typical overhead arrangements, and you end up with one mic near the ride and the other near the hi-hats, which provides good cymbal separation.
In the mix, the isosceles mics are panned hard left (the overhead) and hard right (the mic above and beyond the floor tom). The resulting sound has strong stereo separation, with clearly localized cymbals, a beefy snare tone, and toms that sweep dramatically from left to right. Although it’s not as popular as the more conventional overhead arrangements that we discussed previously, this configuration has quite a bit to offer.
Conclusion
Not only is it much more convenient to track drums using only one, two, or three mics, but there’s also an intangible benefit to a sound that strikes the listener as being “real.” These minimal, organic recording arrangements bring more of the drummer’s natural sound to the tracks. To a certain degree, what you play is what you get. As long as you’re happy with how you play, it’s hard to beat that! Advertisement


